
Have you ever taken a bite of something so delicious that it feels like a party in your mouth? That’s exactly what red velvet cake pops bring to the table! They’re bite-sized, rich, and coated in a silky layer of chocolate, making them perfect for any occasion whether it’s a birthday party, wedding, or just a random Tuesday when you’re craving something sweet.
But let’s be honest, making perfect cake pops can be tricky. Sometimes they fall off the stick, the chocolate coating cracks, or they turn out too dry. No worries I’ve got you covered! In this guide, we’ll walk through every step, troubleshoot common problems, and explore fun variations that will take your red velvet cake pops to the next level. Ready? Let’s dive in!
What Are Red Velvet Cake Pops?
Before we jump into the recipe, let’s break it down. What exactly are cake pops? And why is red velvet the ultimate flavor?
A Bite-Sized Dessert with a Big Impact
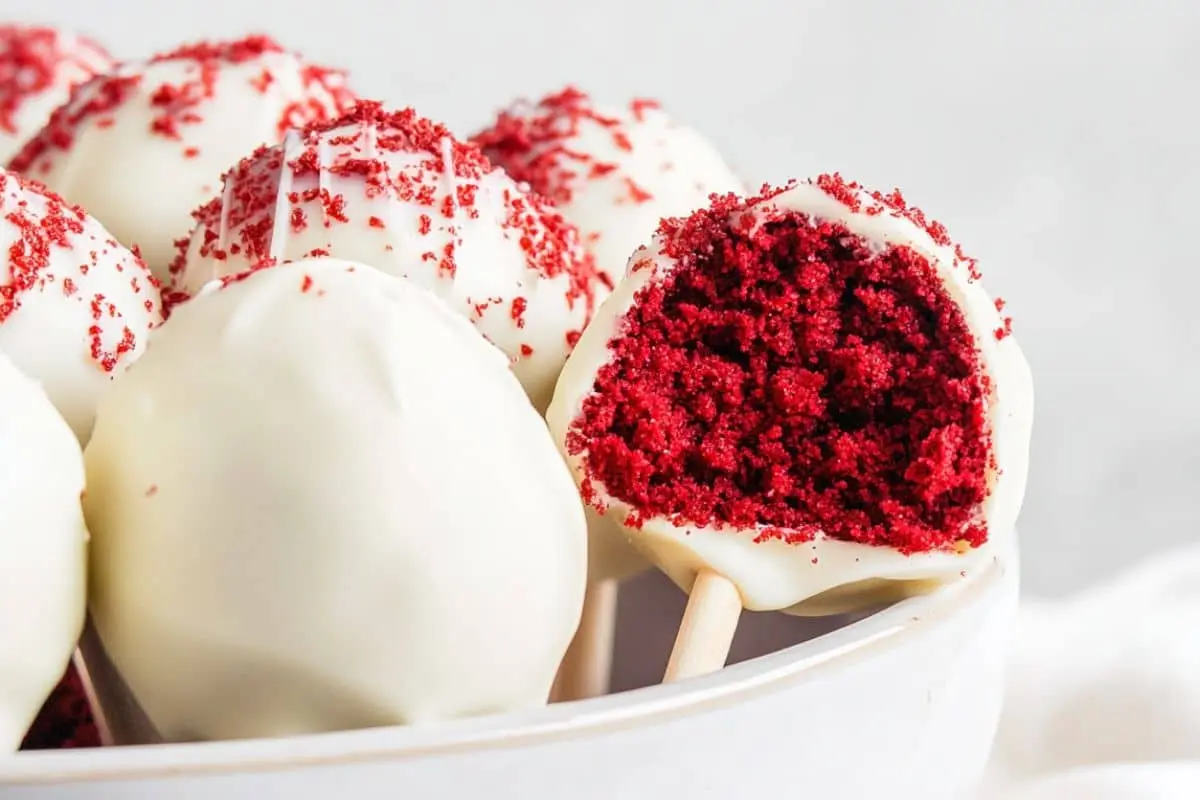
Cake pops are basically cake on a stick—but with a twist! You bake a cake, crumble it up, mix it with frosting, and roll it into bite-sized balls. Then, you dip them in chocolate and decorate them however you like. The result? A moist, delicious, and visually stunning treat that’s easy to eat (and even easier to love).
❤️ Why Is Red Velvet So Special?
Red velvet isn’t just any cake it’s a legendary flavor with a rich, chocolatey taste and a hint of tanginess. The vibrant red color makes it stand out, and when combined with cream cheese frosting, it’s an irresistible combination.
📌 Fun Fact: Red velvet cake became famous in the 1920s, but its popularity skyrocketed when the famous Waldorf Astoria Hotel in New York started serving it!
Ingredients Needed for Red Velvet Cake Pops
Before we get our hands messy, let’s make sure we have all the ingredients. Here’s a simple ingredient breakdown to ensure your cake pops turn out moist, flavorful, and picture-perfect.
Cake Base Ingredients
| Ingredient | Quantity |
|---|---|
| All-Purpose Flour | 2 ½ cups |
| Granulated Sugar | 1 ¾ cups |
| Cocoa Powder | 2 tbsp |
| Baking Soda | 1 tsp |
| Salt | ½ tsp |
| Unsalted Butter (softened) | ½ cup |
| Eggs | 2 large |
| Buttermilk | 1 cup |
| Vanilla Extract | 2 tsp |
| White Vinegar | 1 tsp |
| Red Food Coloring | 2 tbsp |
🧁 Frosting (for Mixing with Cake Crumbs)
| Ingredient | Quantity |
|---|---|
| Cream Cheese (softened) | 8 oz |
| Powdered Sugar | 2 cups |
| Unsalted Butter (softened) | ¼ cup |
| Vanilla Extract | 1 tsp |
🍫 Chocolate Coating & Decorations
| Ingredient | Quantity |
|---|---|
| White Chocolate Melts | 12 oz |
| Dark or Milk Chocolate Melts | 12 oz |
| Lollipop Sticks | 25-30 sticks |
| Sprinkles | As needed |
📌 Pro Tip: Using high-quality chocolate melts instead of regular chocolate bars will give your cake pops a smooth, professional-looking coating!
Step-by-Step Guide: How to Make Red Velvet Cake Pops
Now that we’ve got all our ingredients, it’s time to make magic happen! Follow these steps for cake pops that are moist, delicious, and beautifully coated.
Step 1: Baking the Red Velvet Cake
- Preheat your oven to 350°F (175°C) and grease a 9×13-inch baking pan.
- In a large bowl, whisk together flour, sugar, cocoa powder, baking soda, and salt.
- Add butter, eggs, buttermilk, vanilla extract, and vinegar. Mix until smooth.
- Stir in red food coloring until the batter is evenly red.
- Pour the batter into the prepared pan and bake for 30-35 minutes or until a toothpick comes out clean.
- Let the cake cool completely before moving to the next step.
📌 Patience is key! If you try to crumble a warm cake, it will be too sticky and hard to work with.
Step 2: Making the Cake Crumbs & Mixing with Frosting
Once your cake is cooled, it’s time to turn it into cake pop dough!
- Crumble the cake into fine crumbs using your hands or a food processor.
- In a separate bowl, whip the cream cheese, butter, powdered sugar, and vanilla until smooth.
- Add the frosting to the cake crumbs a little at a time, mixing until you get a dough-like consistency.
📌 You don’t want it too wet or too dry just enough to hold its shape when rolled into balls.
Step 3: Rolling & Freezing the Cake Balls
- Take small portions of the dough and roll them into 1-inch balls.
- Place them on a parchment-lined tray and chill in the fridge for 1-2 hours (or freeze for 15 minutes).
📌 Chilling makes the cake balls firm, which helps them stay on the stick when dipping in chocolate.
Step 4: Dipping in Chocolate
- Melt white or dark chocolate melts in a microwave or double boiler.
- Dip the tip of each lollipop stick into the melted chocolate, then insert it halfway into each cake ball.
- Let it set for 5 minutes before dipping the entire cake pop into the melted chocolate.
- Gently tap off excess chocolate and place the pops upright in a foam block or cake pop stand.
📌 If the chocolate is too thick, add a tiny bit of coconut oil or vegetable shortening to make it smoother.
Step 5: Decorating & Setting
Now comes the fun part decorating!
- While the coating is still wet, add sprinkles, edible glitter, or drizzle with contrasting chocolate.
- Let the cake pops set completely at room temperature or in the fridge for 15 minutes.
- Enjoy your beautiful, delicious homemade red velvet cake pops!
📌 Want to get creative? Try dipping some in white chocolate and some in dark for a mix of flavors!
Nutrition Facts (Per Cake Pop)
| Nutrient | Amount |
|---|---|
| Calories | ~180 kcal |
| Carbs | 20g |
| Sugar | 15g |
| Fat | 10g |
| Protein | 2g |
📌 These numbers can vary based on the type of chocolate and frosting used!
Common Problems and Solutions When Making Red Velvet Cake Pops
Making cake pops can be super fun, but let’s be real—it doesn’t always go smoothly. Cake pops falling off the stick? Chocolate coating cracking? No worries! Here are some of the most common cake pop problems and how to fix them like a pro.
Problem #1: Cake Pops Keep Falling Off the Stick
There’s nothing worse than dipping a cake pop, only to watch it slide right off the stick into the melted chocolate.
Why does this happen?
The cake ball is too heavy for the stick.
The stick wasn’t secured properly before dipping.
The cake pop dough is too soft.
How to fix it:
Dip the tip of the stick into melted chocolate before inserting it into the cake ball. Let it set for a few minutes this acts like glue!
Make sure your cake balls are chilled long enough before dipping. A firmer ball stays in place better.
If the dough feels too wet, add a bit more cake crumbs before rolling.
Problem #2: Chocolate Coating Cracks After Drying
So your cake pops look perfect at first… but then the chocolate cracks as it sets. What’s going on? 🤔
Why does this happen?
The cake pops were too cold when dipped into the warm chocolate.
The chocolate cooled too fast, causing it to shrink and crack.
How to fix it:
Let the cake pops sit at room temperature for 5-10 minutes before dipping. This prevents a shock in temperature that leads to cracks.
Don’t refrigerate immediately after dipping let them set at room temperature first, then move to the fridge if needed.
Problem #3: Chocolate Won’t Stick to the Cake Pop
Ever dipped a cake pop, only for the chocolate to slide right off? Frustrating, right?
Why does this happen?
The cake balls were too oily from the frosting.
The chocolate was too thick.
How to fix it:
Use less frosting in the cake pop dough so they’re not overly greasy.
If your chocolate is too thick, add a teaspoon of coconut oil or vegetable shortening to thin it out.
📌 Bonus Tip: Make sure to use high-quality chocolate melts! Cheap chocolate can have trouble sticking.
Fun Variations of Red Velvet Cake Pops
Want to switch things up? Here are some creative variations to take your cake pops to the next level! 🌟
❤️ Red Velvet Cheesecake Pops
Love cheesecake? Combine red velvet cake with cream cheese filling for a rich, decadent twist. Instead of regular frosting, mix cake crumbs with softened cheesecake filling for a creamy texture!
🌱 Vegan & Gluten-Free Red Velvet Cake Pops
For a vegan version, swap:
Dairy milk → Almond or oat milk
Eggs → Flax eggs (1 tbsp flaxseed + 3 tbsp water per egg)
Cream cheese → Dairy-free cream cheese
And for a gluten-free version, use gluten-free flour instead of all-purpose flour.
💝 Valentine’s Day & Holiday Cake Pops
For special occasions, decorate cake pops with:
Heart-shaped sprinkles for Valentine’s Day
Gold dust or edible glitter for weddings
Red and green sprinkles for Christmas
📌 Pro Tip: You can even turn cake pops into festive cake truffles by skipping the sticks!
Best Occasions to Serve Red Velvet Cake Pops
Cake pops are party showstoppers! Here are some perfect occasions to serve them:
Birthdays – A fun alternative to cupcakes!
Weddings – Elegant, bite-sized treats for guests.
Holidays – Christmas, Easter, Thanksgiving cake pops work for them all!
Gifts – Package them in cute boxes for edible presents.
📌 Want a wow factor? Arrange cake pops into a bouquet for a stunning dessert table centerpiece!
How to Store and Preserve Red Velvet Cake Pops
Got leftovers? Here’s how to store your cake pops so they stay fresh!
Storing at Room Temperature
If you plan to eat them within 2 days, keep them in an airtight container at room temperature.
Refrigeration (Lasts Up to 1 Week)
For longer freshness, store them in the fridge. Just make sure to place them in an airtight container so they don’t absorb fridge odors.
Freezing Cake Pops (Lasts Up to 2 Months)
Need to store them for weeks? Freeze them! Here’s how:
Place cake pops on a baking sheet and freeze for 1 hour (this prevents them from sticking together).
Transfer to a ziplock bag or airtight container.
When ready to eat, let them thaw at room temperature for 20-30 minutes.
📌 Never microwave cake pops to defrost them it’ll ruin the texture!
Tips for Selling Red Velvet Cake Pops as a Business
Thinking of turning your love for cake pops into a side hustle? Here’s how to sell them successfully!
Packaging Ideas for a Professional Look
Use clear treat bags tied with ribbons for a fancy touch.
Offer customized cake pops for birthdays, weddings, and baby showers.
Add personalized stickers with your business name and contact info.
Pricing and Marketing Strategies
Price each cake pop between $2-$4, depending on design and ingredients.
Offer bulk discounts for large orders (like weddings and corporate events).
Market your treats on Instagram, Facebook, and TikTok visuals sell!
📌 Want to stand out? Try “cake pop decorating kits” so customers can decorate at home!
Final Thoughts: Why You Should Try Red Velvet Cake Pops Today!
Red velvet cake pops aren’t just adorable they’re delicious, easy to eat, and perfect for any occasion. Whether you’re making them for a party, a gift, or even to start a business, they’re guaranteed to impress.
So what are you waiting for? Grab your ingredients and start baking! And don’t forget to have fun decorating you might just create a masterpiece.
❤️ Loved this recipe? Share it with your friends and family!
If you love unique dessert twists, don’t miss our Sourdough Brownies: A Unique Twist on Classic Brownies for a rich and fudgy treat!